Sunday 30 October 2016

October Favourites!

Hello my lovelies !

Welcome back. I thought I would write a little post about everything I've been loving during the month of October. The post features some new products I've picked up this month and some I've re fallen in love with. 


Makeup Revolution Rose Gold Lipstick "Chauffeur" - £3


Finally my local superdrug had the new rose gold lipsticks in stock so I thought I'd pick one up. It's a beautiful nude brown with warm undertones  that's super creamy on the lips and lasts for hours. At only £3, it was rude not to. 

Garnier Moisture Bomb Tissue Mask  - £1.49

Lately my skin has been all over the place so I read some blogger reviews on this tissue mask and picked a few up. It's exactly what my skin needed. Goodbye dry dehydrated skin. I can see me using these masks weekly, God send product. 

Original Source Vanilla & Raspberry Shower gel - £2.29


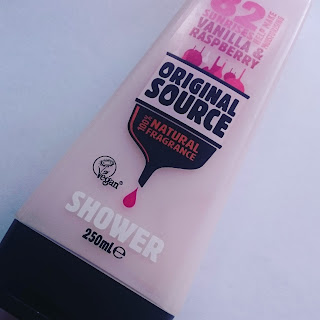
I am obsessed with the sweet scent of raspberries and vanilla in the shower, the gel lathers up and bubbles on my shower puff and my whole bathroom is filled with the gorgeous aroma. Original source do my favourite shower products ever and this is top of the list at the moment. The products are also vegan friendly, cool huh?

Dove daily care Shampoo and Conditioner -£3.99 each. (400ml)


Recently I thought I'd switch up my usual hair care routine and try something new. I'm a big fan of dove soap and bubble bath so I thought I'd give their shampoo and conditioners a try. I wasn't disappointed, my hair was left silky smooth and easy to manage. 

The white company Cassis Signature Candle. £20.

I was kindly gifted this from a parent at work and without even opening the box I could smell the fruity notes of this candle. It's scented with a combination of blackberry fruits and ceder wood which fills my whole flat with sweet woodland scents. I burn this every night and I absolutely love it.
Buy it here.


Hope you've enjoyed reading my October favourites.
Let me know what things you've been loving this month.

Kisses and love
Jazziepickles xoxo

Wednesday 26 October 2016

Garnier moisture bomb tissue mask | Review

Hello my lovelies !


Lately my skin type has been all over the place, it went from dry, to oily and now back to dry. I think the colder weather is having an impact on my skin so it's time to up my skin care game. 

I looked around for ages at hydrating products to help improve my skin and came across a ton of reviews on the garnier tissue bomb mask, so I picked two up and gave them a good old go. 
If you wanna know more, read on.


STEP ONE: Clean and cleanse your skin. It's important to have a completely bare face in order to soak in all that serum !
STEP TWO: Carefully open the foil and remove the mask, place the mask over your face, being careful not to get product in your eyes. Ensure the blue side is face up! 
STEP THREE: Once you're happy with the position of the mask, peel off the top blue layer, exposing the tissue mask. 
STEP FOUR: Adjust the mask to the natural contours of your face. Make sure all your skin is covered.
STEP FIVE: Leave the mask to work it's magic for at least 15 mins. 
STEP SIX: When you're doing, gently peel off the mask and dispose. After you've taken off the mask, there will be some left over product on your face, I left this to soak in for another ten mins then gently patted off any excess. 


Easy Peasy Right? And ohh, so attactive...


REVIEW: Can't help but run my fingers along my face because it's so soft and smooth. For the first time in ages, my skin actually feels refreshed. The mask has no obvious scent which is a plus for me. The mask is suitable for all skin types, dehydrated and dry skin mainly. I found it super easy to apply and fold to fit my face and it didn't slide off when I sat upright. Although it doesn't look so great once it's on, its worth the 15 minuets of looking silly. This mask worked really well for me and I will continue using this to boost my skins hydration.

WAS IT EASY TO USE? 100% so quick and easy to apply, no mess no fuss!
WOULD I USE THIS AGAIN? Over and over again! 
LETS TALK PACKAGING? Light weight, sleek foil packaging. 
EXPENSIVE? Not at all ! I found this in Superdrug on offer for 99p (RRP £1.49)
DID IT WORK? YES! My skin felt, soft smooth and HYDRATED ! 
WHERE CAN I GET THIS? Buy the Tissue bomb here.

Thank you for reading!
I hope you've enjoyed my review
Hugs and love,
Jazziepickles xoxo

DISCLAIMER: This post is not sponsored. This product was not gifted to me and  all thought's and opinions are my own. Photo's featured on this blog are taken and published by myself.

FIND ME HERE!
Twitter: @Jazziepickles
Insta: Jazziepickles
Snapchat: Jazziepickles

Sunday 23 October 2016

Top 5 Favourite mascara's

Hello my lovelies 

Today I am sharing with you my top 5 mascara's and how I achieve lovely long lashes. Mascara can really finishes off an eye look you've spent ages doing so choosing the right one for you is important.

Before applying any mascara, I always curl my lashes, I find it really lengthens them and opens up my eyes more.
TIP: Heat your lash curlers up with a quick blast of the hairdryer to keep your curl longer!


I'm going to start with the most affordable of the bunch and an absolute bargain for all those on a budget. 

Make up revolution Amazing curl mascara "Black"- £2!


This mascara gives a really natural finish to my lashes but still gives me length! It's really handy if I'm not feeling to much drama on my eyes and just want some subtle definition and length. The wand is curved to catch every lash and separate them beautifully.
I must say it's not the most long lasting mascara but I don't find it crumbles or flakes during the day which is also a bonus. Nothing worse than mascara flakes over your face!

Maybelline lash sensational mascara "Intense black" - £7.99


A few months ago I read a lot of reviews on this mascara and saw it featured in a lot of my favourite youtuber videos so I thought I'd pick one up and see if it was worth the hype. Within first use I was obsessed! This mascara gave the false lash effect, length and volume I always wanted! Another curved wand to easily coat every lash. It was so easy to apply, dried quickly and lasted alllll day and night! 
I heard this mascara was a dupe for the benefit roller lash but in my opinion the formulas are completely different.
I can't recommend this mascara enough, it's such a good product! A real drugstore gem,  I use this daily and re-purchase over and over again.

MAC zoom lash "Black" -£15


To begin with I HATED this mascara,  I was so disappointed when I tested it out, I didn't like the formula and it did nothing to my lashes but clump them together at the base. It sat in my collection for months, unloved and unused. One day I was rushing to get ready and picked up any mascara I could find, just so happened to be the zoom lash. I coated my lashed from root to tip and the results where completely different I had to have another look to make sure it was zoom lash.  My lashes had drama, full volume and length that almost reached my brows! I was so shocked. 
Since then I've been reaching for this a lot more when I want a little extra something! 

Benefit they're real Mascara "Black" - £19.50


This was my favourite 'go to' mascara for so many years! I fell in love with how it made my lashes look. Whenever I wore it, people would always question what mascara it was and compliment how wispy and fluttery my lashes were. It gave me super dramatic length and lasted morning to night. The wand has little plastic bristles that capture even the tiniest lashes, giving them a really boost! The tip of the wand is domed too, so you can fan out the outer longer lashes for extra "ooomph" 
Slightly pricer than the other mascara's mentioned but definitely worth every penny !
TIP: Use an oil based cleanser to remove, because it's so long lasting it's a pain to get off!

Benefit Roller lash "black" - £19.50


Currently my favourite mascara, I picked one of these up at the airport back in April and I've been obsessed ever since! Another curved wand (Can you tell there my favourite) with longer plastic bristles on one side and shorter on the other. This wand picks up lashes I didn't even know I had.
Sometimes I don't even remember I have this mascara on because it's super light weight and doesn't leave my lashes feeling dry and hard. There's a few cool ingredients in the formula like provitamin B5 and serin which are known for lash conditioning benefits. 
If I had to use a mascara for the rest of my life I'd chose this. I'm so obsessed and if you haven't tried it, you're missing out! 


That's all for now, I hope you've enjoyed reading.
What is your 'Go To' Mascara?

Kisses and Love
Jazziepickles xoxo


Disclaimer: This post is not sponsored, all thoughts and opinions are my own and every product mentioned was purchased with my own money. 


Sunday 16 October 2016

10 Step easy make up look.

Hello my lovelies 

Welcome back !
Today I'll be showing you the products and tools I use when creating my everyday make up look. I wear this for work or a quick trip to the shops. Nothing fancy or time consuming.


STEP ONE:  Skin preparation.
I always find my make up applies easier and stays put when I properly prep my face. In the shower I'll clean and cleanse my skin, removing and dirt and make up. Then I'll exfoliate to remove any dead skin cells. 
Once out the shower I will moisturise my skin and leave it to soak in before adding any cosmetic products. 

STEP TWO: Prime!  
I can't stress enough the importance of priming your face before applying your base. A good primer will fill in any fine lines, pores and acts as a barrier between your skin and foundation. I personally like to use the smashbox photo finish foundation finish light. It's oil free and and works incredibly well for smoothing over my face. Usually I'll apply my primer with my fingers and make sure I cover all my problem area's. 

STEP THREE: Foundation
For everyday wear I love the Maybelline Fit Me foundation in shade Natural Ivory. I always struggle to find a drugstore foundation that is light enough for my pale skin, this one comes pretty close. I use a damp real techniques miracle sponge and bounce that around my face evenly,  blending down into my neck.
(Excuse my dirty sponge)


STEP FOUR: Concealer
Currently, I'm obsessed with the collection lasting perfection concealer in the colour Fair 1, the coverage is amazing and it doesn't crease. To apply my concealer I make a triangle under my eyes to brighten them up, a small line down my nose, a cross on my chin and forehead then add a small amount to any blemishes or imperfections I want to cover. Going in with my damp sponge again I hop it around the area's until blended.

STEP FIVE: Powder
My powder of choice is the Rimmel Stay Matte Pressed Powder in Peach Glow. I've used this powder since I was a little teeny bopper and I still love how it sets my make up for hours and stops my skin from looking shiny! Using a big make up revolution powder brush I add a light layer of powder all over my face to set the base make up.


STEP SIX: Contour, blush, highlight.
To contour, I use the Make up revolution sculpt and contour kit in CO1. I swirl around and pick up a small around of product on a angled contour brush. Sucking in my cheeks I find the area under my cheek bones and apply the contour colour in one swift sweep. Tap off any excess product and then use small circle motions to blend out the harsh line. 
For blush I use the same palette and a similar brush. Do a big cheesy grin and find the apples of your cheeks, then apply your blusher. Blend your blush well to avoid the clown look. 
To highlight I use a small fluffy brush and pick up a little bit of the highlighter shade then use small back and forward motions over the tops of my cheek bones, blending evenly. 
If you use the contour kit mentioned above, note that a little product goes a long way. The powders are really pigmented so you don't need to add much.


STEP SEVEN: Eye shadow.
In the morning I don't have time for a fancy 10 colour eye look, I literally use one shade in my crease using a small fluffy brush. Usually a light brown shade to add some definition and colour to my eyes. Starting from the outter corner, I pop on my shadow and blend towards the middle of my eye, only in the crease. Easy as that!

STEP EIGHT: Brows.
Since having a full fringe that completely covers my brows I'm guilty of neglecting them. But when I feel like doing them I use a tiny angle brow brush and a brow powder from freedom. I outline my brows and fill them. I like my brows to start light then go darker and more defined so the duo powder from freedom is great for that.


STEP NINE: Mascara + Liner.
In my opinion, benefit do the best mascaras on the market. My two favorites are "They're real" and "roller lash" They give my lashes length and volume. I start by curling my lashes, gently pressing the curler for a few seconds then apply your mascara straight away to keep the curl. Try and get the wand as close to the start of your lash as possible and wiggle up and out to create beautifully long curly lashes. I have really long lower lashes so I usually just touch the lashes with the wand and that's enough.
My favourite eyeliner of all time is the Rimmel Exaggerate Eyeliner in Black. Another product I've used for years! All I do is a simple line across my lash line, starting thin using the point of the applicater and getting thicker towards the end of my lash line. No wing, no fuss.


STEP TEN: Lips.
For an everyday look you can't go wrong with a nude lip. My collection is full of different nude colours but my personal favourite is "honey love" from MAC. It' a light subtle nude colour, perfect for everyday wear and lasts for ages!  I just apply a thin layer coating my lips and outlining the shape.


.. And there we have it. My Ten step easy make up tutorial. I hope you found this useful, let me know if you've tried any products mentioned above.

Kisses and love
Jazziepickles 
xoxo


Wednesday 12 October 2016

Justin Bieber Live in London 11/10/16

Hello Lovelies

After waiting a LONG 10 months, the day finally arrived. Justin Bieber live in concert at London's o2! To say I've been excited about this day would be an understatement!


So me and my pal Chloe hopped on a train to London's Kings Cross, took the Northen line to Camden town and got some food. I haven't been to Camden in years but whenever I visit the beautifully quirky town I also stop by to get some street food, mostly Chinese and infamous bang bang chicken. The stall I used to visit as a teenage dirtbag was closed. Fuming. We took a stole around and found another Chinese. I ate what felt like my weight in noodles and sweet and sour chicken, but it was so damn tasty.

Sunday 9 October 2016

Shadow Switch Review | Jazziepickles

Hello my lovelies.
Today's post is going to be a little review on a beauty tool I was kindly gifted from the guys at Beauty Essentials UK . It's the "Shadow switch", a dry brush cleaner that allows you to mix and match different powder products and use the same brush. Pretty impressive right?


So above, you can see the product and a few of my eye brushes from the brand Royal and Lang-nickle which I bought from hooked up.


First impressions: So when the postman rammed this little package in my letterbox I was so excited to see how it worked and give it a go. First thing I noticed was how lightweight it is, it weighs practically nothing. Once opened I was surprised at just how simple it was, essentially it's just a soft mesh like sponge in a tin. Sceptical was an understatement. 

First use: I used two fluffy brushes to test the product. Swirling my brushes into two different shadows, I blended onto the back on my hand. To start I used a really light brown shade. Then I pressed the fluffy brush hairs into the sponge and swirled my brush for around 15 seconds. I could see the product left on the sponge and my brush hairs had stained BUT there was no excess brown shadow on my brush. I tested on the back of my other hand to see if any colour came off, there was none. Repeating the same process I used a smokey dark grey, swirled my brush around in the shadow switch then picked up a really light grey colour. There was absolutely no dark product left on my brush. 

Would I use this product: 100% ! It's such a simple yet effective way of cleaning your brush when creating eye looks. The tin is super light weight so easy for traveling and on the go for any touch ups, and its pretty compact so easy to store. I love that I can now use the same brush with different shades without the hassle of a proper clean and dry (We all hate that right?) 

Would I recommend this product? Definitely. I can see it being a really handy little tool to have and perfect for professional MUA's. 

Is the Shadow Switch expensive, and where can I buy one? Currently, the Shadow Switch is available to purchase on Amazon for a very good price point of £5.99! They'll soon be available on Sephora. 

THINGS TO NOTE: Beauty essentials are in the process of repackaging a lot of their products for launch. The shadow switch I've been sent is in the old packaging. I've attached a photo below of what the shadow switch will look like for the new launch. Same great product, just in a new packaging. 


DISCLAIMER: This product was kindly gifted to me in return for review, however all thoughts and opinions are my own. 


Saturday 8 October 2016

7 tips to happiness | Jazziepickles

Hey lovelies !

Recently some people around me have been going through some tough times and are trying hard to disguise their unhappiness, so I've decided to write a little post on my tips and tricks to happiness. I hope this helps anyone who's feeling down or upset. 

  1. Set yourself goals, big or small, long term or short. Be realistic. What do you want to achieve in a month, it could be something as simple as putting aside being more organised and buying a planner or, as big as losing a stone and joining a weight loss group. Whatever is getting you down, set goals to help tackle the issue. 
  2. Spare cash for a rainy day. A lot of people in my life have financial struggles, I grew up in a family with low income and difficulty. Somehow, we always managed to to get by and have the things we need. When I got older and began earning my own income it was a novelty, I could buy whatever I wanted. It was different and excited, However, I always made sure I paid all my outgoings. I watched my family struggle and told myself I wouldn't do the same so, I always put some money aside and saved. I made sacrifices to ensure I had enough money to live comfortably. Currently me and my partner are saving are arses off for a mortgage deposit and we're doing pretty well and I can't wait to be a home owner, but it's always nice to know that we have money if we should need it. 
  3. 3. Appreciate what you have! There are millions of people in the world that would give a limb for what you have. A warm home with clean running water filled with memories of those who love you, probably feels normal right? Luckily we live in a country that provides homes and help. Moan all you want about the government and how they have ruined this country. You're wrong, because we're not the people living in fear of war, deadly illness and disease or horrendous natural disasters. 
  4. Surround yourself with positive people. We're all so quick to judge and hate, admittedly  I'm guilty of this, but there are some people in my life who, when I'm with I just feel completely comfortable and happy. If someone is dragging you down and rubbing off their negative vibes, bin them off! Ain't nobody got time for that !
  5. Keep busy. Doing the things you enjoy the most will take your mind away from whatever is making you sad. Personally, I like to colour. When I'm stressed or bored I grab a intricate detailed colouring book and spend hours creating a real master piece (I wish) If colouring isn't your thing, take a walk in the woods with some friends, bake a cake or go to the gym. You'll feel better for it, if only for a few minuets, I promise. 
  6. Allow yourself time. In the fast paced world we live in, sometimes it feels like there aren't enough hours in the day. Schedule in some quality "me time". Read your favourite book, watch your favourite movie, put on a face mask and have a bubble bath. These are all things I like to do, usually on my own. 
  7. Smile. Even if you don't feel like smiling. It could make someones day and that feels good. 
REMEMBER: Every day may not be good, but there is something good in everyday!


Saturday 1 October 2016

Hair journey and current care routine. | Jazziepickles

Hello my lovelies
Today I will be sharing with you my hair care routine and a little back story about my hair.

So from the age of around 12 I have always been interested in experimenting with my hair, different styles, cuts and COLOURS. I have had so many colours in my hair it became ridiculous. Remember the song McFly came out with about the girl with 5 colours in her hair, yep, pretty sure that was about me. ANYWAY.. my hair has endured a lot of harmful chemicals from bleach and dye and colour strippers and was further damaged from the excessive heat used to style my hair.  
I've pictured below (Reluctantly) some of the colours I've had my hair.